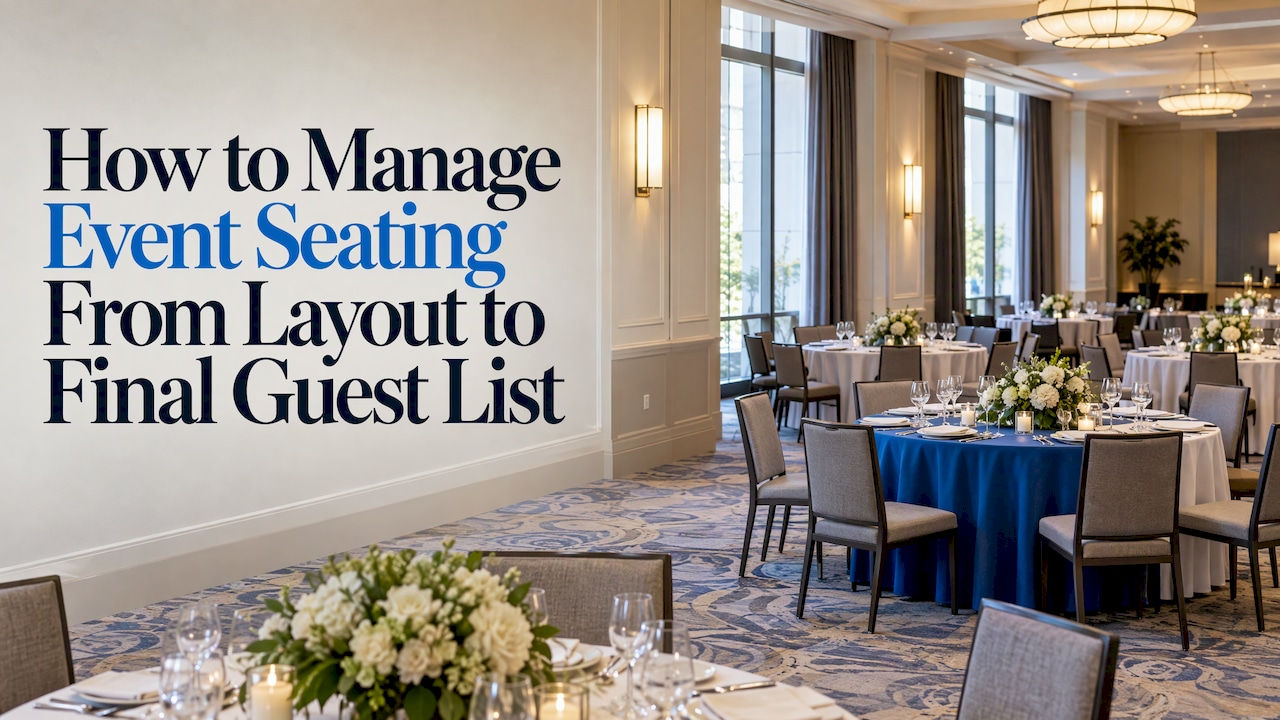
Managing event seating comes down to four decisions made in order: pick a layout that fits the room and the event’s purpose, work out how many guests it holds, assign seats from the registration data, and keep one current plan that everyone on your team uses. The step that breaks most seating plans is the third and fourth: assignments kept in a spreadsheet that drifts away from the guest list.
rsvpBOOK has supported event organizers since 2004, and its group and table registration is built so seating starts at sign-up, not after it. This guide walks through the whole process for banquets, conferences, workshops and trade show receptions.
TL;DR
- Start with the event’s purpose, then choose the layout: rounds for dinners and networking, theatre for presentations, classroom for note-taking.
- Plan floor space per guest and aisle widths before you place a single table.
- Collect seating needs (groups, access, dietary) at registration so assignment is a sorting job, not a guessing game.
- Keep one master plan, publish guest lists by name and by table, and make table numbers easy to see.
- Sit at every table before doors open to check sightlines.
Table of Contents
- Start with the purpose, not the floor plan
- Work out how many people the room really holds
- Collect seating information at registration
- How to assign event seats and banquet tables
- Seating for sessions, workshops and CE credits
- Seating for trade shows and career fairs
- Keep one current plan and share it
- On event day: check-in, badges and signage
- Check sightlines and accessibility before doors open
- Our perspective
- Run your seating from one registration record
- FAQ
- Sources
Start with the purpose, not the floor plan
A seating arrangement is a tool for something: learning, conversation, a meal, a show. Decide which one leads. Skift Meetings’ room layout guide says to weigh attendee numbers, room dimensions, event objectives, activities, furniture and safety, and to decide whether the priority is learning, interaction or a quiet space.
Event designer Alex Perica, quoted in The Meeting Magazine’s April 2026 planner insights, advises starting room design with the event’s purpose, then considering note-taking, small-group work, video, microphones and audience Q&A. Those details change the layout. A room where people take notes needs tables. A room built around a keynote needs sightlines first.
A quick way to match purpose to layout:
| Event goal | Layout that usually fits | Why |
|---|---|---|
| Seated dinner, awards, gala | Banquet rounds | Conversation at the table, easy service |
| Keynote, general session | Theatre | Most people in the least space |
| Training, CE session, workshop | Classroom or rounds | Space for notes, laptops and group work |
| Networking reception | Mixed: a few seated clusters plus open space | Movement between conversations |
| Career fair or trade show | Open floor with booth map | Traffic flow matters more than seats |
If your event mixes these, such as a general session followed by a lunch, plan each room state separately and note how long the flip takes.
Work out how many people the room really holds
Capacity on a venue sheet is a ceiling, not a plan. Furniture, aisles, a stage and a buffet line all take space. Matters of Gathering’s floor plan guidelines suggest allowing 18 to 20 square feet per person for a seated dinner, 20 to 22 for a buffet dinner and 8 to 9 for theatre-style seating.
The same guide gives spacing figures worth keeping on your checklist:
- Round tables: at least 60 inches between tables.
- Rectangular tables: at least 52 inches without a service aisle, 60 inches with one.
- Pathways: at least 36 inches of clearance, with 3 feet at fire and exit doors.
- Theatre rows: 18 inches minimum between rows, 6 inches between chairs side to side.
Table capacities from that guide: 6 guests at a 4-foot round, 8 at a 5-foot round, 10 at a 6-foot round, and 6 at a 6-foot harvest table.
Fire codes and venue rules vary by city and building, so confirm final capacity and exit requirements with the venue and the local fire marshal’s office. Treat the numbers above as planning guidance.
A worked example
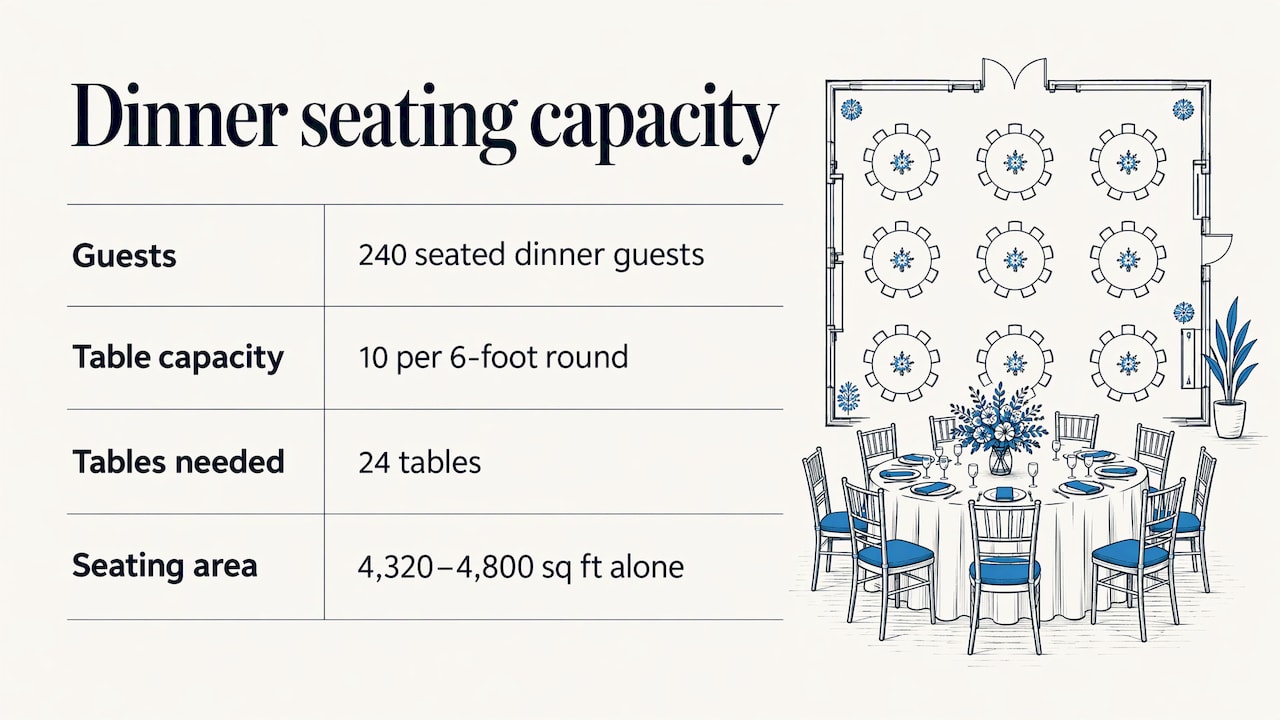
Say you expect 240 guests for a seated dinner. At 10 per 6-foot round, that is 24 tables. Add a head table, a dance floor or a stage, and a buffet or bar, and the space need grows beyond the table count. At the 18 to 20 square feet guideline, 240 guests need roughly 4,320 to 4,800 square feet for seating alone. Compare that with the venue’s floor plan, then add the stage and service areas on top.
Now account for walk-ups. Skift notes that potential walk-ups, sightlines, wheelchair access and crowding all affect whether a layout works. If registration stays open until the week of the event, plan a few spare seats per section.
Collect seating information at registration
Seating is easiest when the information arrives with the registration. Waiting until a week before the event to ask who wants to sit with whom creates a flood of emails and a manual rebuild.
Ask for what you will actually use:
- Group or table affiliation: a company, department, school or family that should sit together.
- Access needs: wheelchair space, proximity to an aisle or exit, front-row seating for visibility or hearing.
- Dietary or meal choice: so the kitchen can match meals to tables.
- Role: speaker, sponsor, honoree, VIP, host.
- Networking goals: optional, but useful if the point of the event is introductions.
rsvpBOOK lets organizers build branded registration sites with custom questions, registrant types and group or table registration, so these answers sit in the same record as payment and ticket type. That matters when a table sponsor registers ten guests: the sponsor, the guests and the table stay linked instead of living in three files. Pricing is per registration, with discounted rates for nonprofits and government organizations.
For events where seats are part of the offer, such as a sponsored table at a fundraising dinner, set up discounts and ticket types so a table purchase and an individual seat are distinct choices from the start. Our event registration software page covers how those paths are configured.
How to assign event seats and banquet tables
Once the data is in, assignment follows a predictable order.
- Place the fixed seats first. Head table, speakers, honorees, sponsors and accessible seating go in before anyone else.
- Seat the groups. Keep pre-registered tables and company groups intact. Count the group size against table capacity, and split large groups across adjacent tables, not distant ones.
- Distribute the individuals. Mix by the goal of the event. For networking, spread people across industries. For a fundraiser, put your most engaged supporters near the stage and the donors you want to introduce at the same table.
- Assign a host to each table. Young Life’s Banquet Handbook advises assigning a host to each table and matching individual reservations to the right hosts. A host welcomes guests, keeps conversation going and flags problems early.
- Hold a small reserve. Leave one or two open seats in a few tables for late changes.
- Lock a cutoff. Pick a date after which changes go through one person.
Table assignment tools exist in the registration platform itself. rsvpBOOK documents a Banquet Table Wizard in its help center, which is the place to see how table assignment is set up for your event.
Seating people who should not sit together
Some events need separation: competing exhibitors at a sponsor lunch, recruiters from rival firms, or family members at a banquet. Keep a short private list of conflicts, and check it each time you move a table. A conflict list takes minutes to write and prevents the one awkward moment guests remember.
Seating for sessions, workshops and CE credits
Training managers and CE providers face a different version of the problem: seats are tied to sessions, not just rooms. Capacity limits per workshop, assignment to the right session and attendance records for credits all matter.
rsvpBOOK supports sessions and workshops with CE credits, so registrants can pick sessions at sign-up and organizers can track who is assigned where. If a classroom holds 40 and the workshop has 55 interested people, you see the demand before the room is set. See sessions and workshops for the setup.
For each session room, decide on the layout using the same logic: classroom or rounds when people write and discuss, theatre when the content is a presentation. Then confirm the count of seats against the session capacity you published.
Seating for trade shows and career fairs
At a trade show or career fair, the “seating plan” is mostly a floor plan. The question is where booths sit and how traffic moves, though receptions, lunches and keynotes may still need table assignments.
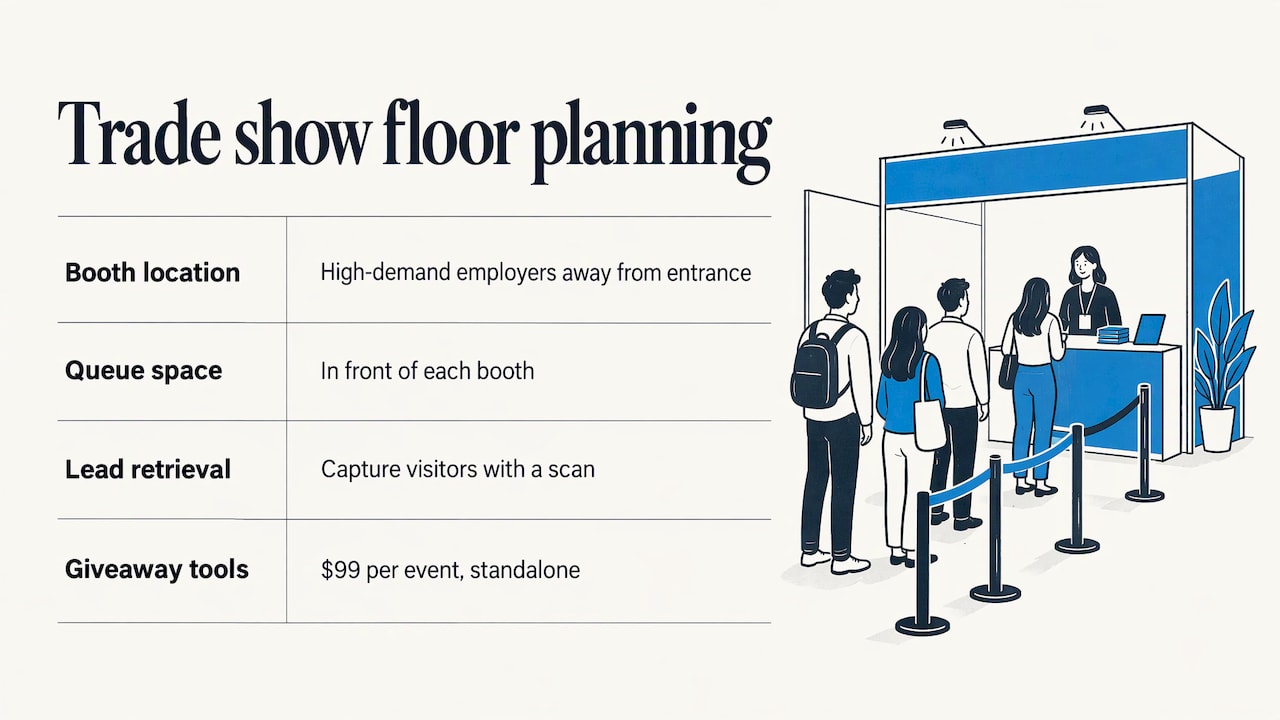
For exhibitors, rsvpBOOK offers interactive booth maps with booth sales, so exhibitors choose and buy a booth on the map, and organizers see the floor fill up. Lead retrieval lets exhibitors and organizers capture visitors with a scan. Booth giveaways, either an Instant Prize Wheel or a live Winner Drawing, turn booth visits into qualified leads. Standalone booth giveaway tools start at $99 per event. Explore lead retrieval and the trade show prize wheel and winner drawing.
For career fairs, recruiters care about two things: candidate capture and booth traffic. Place high-demand employers away from the entrance so lines do not block the doorway, and leave queuing space in front of each booth. A prize wheel or drawing at the booth gives candidates a reason to stop and gives recruiters a natural moment to scan and talk.
Keep one current plan and share it
The plan changes right up to the event. The risk is not the change itself, it is two people working from different versions.
A few habits keep it clean:
- One master file or record. Everyone edits there. Everyone else views.
- Date and version every export. Put the date in the file name and on the printed copy.
- Make one person the gatekeeper after the cutoff date.
- Produce lists two ways. The Young Life handbook recommends guest assignment lists both alphabetically and by table number, with bold, visible table numbers. Alphabetical lists help guests find themselves. Table lists help the kitchen and hosts.
- Tie the plan to your task list. Setup times, linen counts and signage deadlines belong in the same place as the seating plan. These project management tools for event planners can help keep those tasks aligned with the room design.
Because rsvpBOOK keeps registration, payments, sessions and reporting in one record, a late registration or cancellation updates the same data your seating relies on. Custom reports and automated alerts help you see changes as they happen, and the event management software page shows how the pieces connect.
On event day: check-in, badges and signage
A good seating plan fails if guests cannot find their table. Put the table number where guests will see it as they check in.
- QR check-in is free on any smartphone with rsvpBOOK. One customer moved 2,600+ attendees through check-in with QR scanning.
- Kiosk+ self check-in lets guests check themselves in at a station.
- Custom name badges can carry the details you choose.
- Hardware: badge printing and check-in kiosk hardware are optional add-on rentals.
- Mobile attendee app: with personalized agendas and messaging, so you can message guests about a room change.
SMS reminders help get the right people to the right room on time. Details for each tool are on the features page.
Check sightlines and accessibility before doors open
The cheapest quality check in event planning is also the one most often skipped. The Young Life handbook says to sit at every table before the event and check that guests can see, especially if video will be presented. A pillar, a speaker stack or a camera riser can turn a good table into a bad one.
Walk this checklist in the room:
- Can every seat see the stage and the screen?
- Are the accessible seats on a route with at least 36 inches of clear path?
- Are exits unobstructed?
- Can the audio be heard at the back and the sides?
- Are the tables for speakers, sponsors and honorees in the best sightlines?
If networking is a goal, think about sound too. Room acoustics and background music affect whether people talk. A guide on planning a networking room looks at how sound shapes conversation at conferences.
Dahlton Bennington, CMP, CIS, CMM, quoted in The Meeting Magazine, says room design should balance goals and budget with audience needs, comfort, engagement and a sense of belonging. Seating is where that balance shows.
Our perspective
Most seating trouble starts before anyone draws a table. It starts when registration, payments and seating live in separate places, and someone has to reconcile them by hand the week of the event.
That is why rsvpBOOK connects every stage of an event in one record. Guests register, pay, choose sessions and answer your custom questions in one place, and the same data is there when you build the room. We have supported event organizers since 2004, and we have seen that complex events do not need a complex platform. They need flexible configuration and a team that helps when asked.
That is the thinking behind rsvpBOOK as a flexible alternative to enterprise event platforms. You can set up on your own, with the help of our AI-assisted builder that turns an event design document into a working setup, or work with our hands-on implementation support when the event is large or the timeline is tight. Pricing is per registration, with discounted rates for nonprofits and government.
Droshawn
Run your seating from one registration record
If your seating plan depends on who registered, who paid and who asked to sit together, it works best when that information is in one place. rsvpBOOK gives organizers branded registration sites with custom questions, registrant types and group or table registration, along with sessions, check-in, badges and reporting, all in one record. Pricing is per registration, and nonprofits and government organizations get discounted rates. Hands-on implementation support is available when an event needs it.
See the Event Registration page for how registration paths are built, or browse the full feature list.
FAQ
What is the best way to create a seating chart?
Start with the room’s floor plan and the layout that suits your event’s purpose. Place fixed seats first, such as head table, speakers and accessible seating, then seat registered groups, then individuals. Keep the chart in one master record and publish it by name and by table.
How do I assign seats for a large banquet?
Collect group, meal and access information at registration. Seat groups together, assign a host to each table and leave a few open seats for late changes. Set a cutoff date after which one person approves changes.
How much space does each guest need?
One planning guide suggests 18 to 20 square feet per person for a seated dinner, with at least 60 inches between round tables. Confirm final capacity and exit rules with the venue.
How do I handle seating changes close to the event?
Use one master plan, date every version and give one person authority over changes after the cutoff. Keep registration data and seating in the same system so cancellations and additions are reflected quickly. Print table lists late, and keep a few reserve seats.
Does rsvpBOOK support table registration?
Yes. rsvpBOOK offers group and table registration, along with custom questions and registrant types. Its help center documents the Banquet Table Wizard for table assignment.
Ready to see it with your own event? Book a demo or start building an event free.
Sources
- An Event Planner’s Guide to Engaging Room Layouts
- Planner Insights: Meeting-Room Design
- Essential Floor Plan Guidelines for a Successful Event
- Young Life Banquet Handbook
- Project management tools for event planners
- Planning a networking room
Recommended
Planning an event that doesn’t fit neatly into somebody else’s template? See how rsvpBOOK handles registration, onsite check-in, lead retrieval and engagement in one platform. Book a demo: https://www.rsvpbook.com/book-a-demo

